Vue Router介绍
Vue Router是Vue.js官方的路由管理器。它和 Vue.js 的核心深度集成,让构建单页面应用变得易如反掌。包含的功能有:
- 嵌套的路由/视图表
- 模块化的、基于组件的路由配置
- 路由参数、查询、通配符
- 基于 Vue.js 过渡系统的视图过渡效果
- 细粒度的导航控制
- 带有自动激活的 CSS class 的链接
- HTML5 历史模式或 hash 模式,在 IE9 中自动降级
- 自定义的滚动条行为
使用Vue Router
创建带有Vue Router的项目
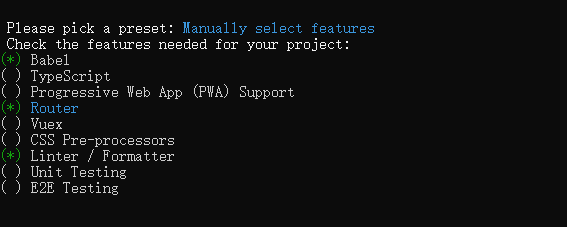
使用vue cli 创建项目
vue create [项目名]在配置项中选中Router
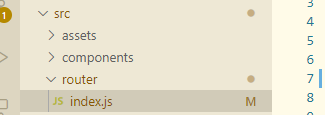
在项目中可以看到一个router文件夹,index.js文件中记录了初始的路由信息
router-link 与 router-view标签
<template>
  <div id="app">
    <div id="nav">
      <router-link to="/">Home</router-link> |
        <a href="/">a tag</a> |
      <router-link to="/about">About</router-link>
    </div>
    <router-view />
  </div>
</template>使用<router-link> 创建a标签来定义导航链接,通过传入 to 属性指定链接
如果直接使用a标签替代<router-link>,那将会刷新整个页面,而不是单页面应用需要的局部刷新
<router-view> 标签,即路由出口,会将路由匹配到的组件渲染标签所在位置
添加一个新的路由和页面
先在views中新建一个页面,然后修改路由配置文件
引入
import Brazil from "../views/Brazil.vue"修改routers,添加
{
  path: "/Brazil",
  name: "Brazil",
  component: Brazil
}然后在App.vue中添加一个router-link
<router-link to="/Brazil">Brazil</router-link>懒加载
只加载需要的组件,而不是一次全部加载,可以在路由配置文件中使用另一种写法
{
  path: "/Brazil",
  name: "Brazil",
  component: () => import( /* webpackChunkName: "Brazil"*/ "../views/Brazil")
}
使用箭头函数,这时当点击到Brazil页面时,才会加载Brazil组件
/* webpackChunkName: "Brazil"*/ 改变bundle的名称

修改路由选中的颜色
选中的路由会添加一个router-link-exact-active类,可以对其进行修改
#nav a.router-link-exact-active {
  color: #ab26ab;
}
还可以在修改Router配置,自己命名路由被选中时添加的类名
const router = new VueRouter({
  linkExactActiveClass: "vue-router-is-selected",
  mode: "history",
  base: process.env.BASE_URL,
  routes
});
#nav a.vue-router-is-selected {
color: #ab26ab;
}匹配的优先级
同一个路径可以匹配多个路由,匹配的优先级按照路由的定义顺序,谁先定义,谁的优先级高
404页面
当没有对应路由时,应该跳转到404页面
由于路由匹配优先级的特点,可以在路由配置的末尾添加一项,path为'*' ,component指向404页面
const routes = [{
    path: "/",
    name: "Home",
    component: Home,
    props: true
  },
  {
    path: "/details/:slug",
    name: "DestinationDetails",
    component: () => import( /* webpackChunkName: "DestinationDetails"*/ "../views/DestinationDetails"),
    props: true
  },
  {
    path: "*",
    name: "404",
    component: ()=> import("../views/404")
  }
];
pathMatch
const routes = [
  {
    path: "/user-*",
    name: "user",
    component: ()=> import("../views/user")
  }
];这时路由为user-开头的都会被匹配到,且剩余的部分会被保存到pathMatch中
// 路径为localhost:8080/user-admin
console.log(this.$route.params.pathMatch);	// 输出admin
hash模式与history模式
vue router默认为hash模式,hash 模式使用 URL 的 hash 来模拟一个完整的 URL
http://localhost:8080/#/details/brazil
在配置文件中添加mode: "history"切换为history模式,使url看起来更加正常
http://localhost:8080/details/brazil
动态路由匹配
如果许多页面结构类似,每个页面使用一个组件会很麻烦,可以将匹配到的路由全部映射到同一个组件中
{
  path: "/details/:slug",
  name: "DestinationDetails",
  component: () => import( /* webpackChunkName: "DestinationDetails"*/ "../views/DestinationDetails")
}路由参数使用: 标记,/details/1 、/details/aaa 等都将匹配到该路由。当匹配到一个路由时,参数值会被设置到 this.$route.params,可以在每个组件内使用。
<template>
  <section class="destination">
    <h1>{{destination.name}}</h1>
    <div class="destination-details">
      <img
        :src="require(`@/assets/${destination.image}`)"
        :alt="destination.name"
      >
      <p>{{destination.description}}</p>
    </div>
  </section>
</template>

<script>
import store from "@/store.js";
export default {
  data() {
    return {
      slug: this.$route.params.slug	// 获取参数
    };
  },
  computed: {
    // 获取路由参数对应的数据
    destination() {
      return store.destinations.find(
        destination => destination.slug === this.slug
      );
    }
  }
};
</script>当路由参数变化时,如果使用的是同一个组件,尽管路径已经显示改变,但内容可能不会刷新,这时可以在<router-view>中添加key
<router-view :key="$route.path" />
将key设置为$router.path,当path发生变化就会进行刷新
使用props
先修改router配置文件,添加props:true
const routes = [{
    path: "/",
    name: "Home",
    component: Home,
    props: true
  },
  {
    path: "/details/:slug",
    name: "DestinationDetails",
    component: () => import( /* webpackChunkName: "DestinationDetails"*/ "../views/DestinationDetails"),
    props: true
  }
];
这样就可以直接在props中获取路由参数了
<script>
import store from "@/store.js";
export default {
  data() {
    return {
      // slug: this.$route.params.slug // 原来获取参数的方式
    };
  },
  props: {
    // 使用props获取路由参数
    slug: {
      type: String,
      required: true
    }
  },
  computed: {
    // 获取路由参数对应的数据
    destination() {
      return store.destinations.find(
        destination => destination.slug === this.slug
      );
    }
  }
};
</script>
props还可自定义参数
const routes = [{
    path: "/",
    name: "Home",
    component: Home,
    props: true
  },
  {
    path: "/details/:slug",
    name: "DestinationDetails",
    component: () => import( /* webpackChunkName: "DestinationDetails"*/ "../views/DestinationDetails"),
    props: (route) =>({
    	slug: route.params.slug,
        title: route.query.title
    })
  }
];在组件中使用props: ['slug', 'title']获取
查询参数query
跳转中配置query
<router-link :to="{name: 'page', query: {id: 1, title: 'foo'} }"></router-link>在page页面中获取
const {id, title} = this.$route.query路由重定向
const routes = [
  {
    path: "/",
    redirect: "/Home"
  },
  {
    path: "/Home",
    name: "/Home",
    component: ()=> import("../views/Home")
  }
];当访问localhost:8080/时,会重定向到localhost:8080/Home
// 这样写效果相同
const routes = [
  {
    path: "/",
    redirect: {name: 'Home'}
  },
  {
    path: "/Home",
    name: "/Home",
    component: ()=> import("../views/Home")
  }
];
别名
可以给路由起一个别名
const routes = [
  {
    path: "/user",
    name: 'user',
    component: ()=> import("../views/Home"),
    alias: 'aaa'
  }
];
编程式导航
// 跳转到path为"/"
this.$router.push('/')
// 命名的方式
this.$router.push('name')
// 对象
this.$router.push({
    path:'/'
})
// 传参
this.$router.push({
    name:'user',
    params: {id: 2}
})
this.$router.push({
    path:'/register',
    query: {id: 2}
})
// 后退1
this.$router.go(-1)
// 前进1
this.$router.go(1)
嵌套路由
命名视图
导航守卫
导航表示路由正在变化
完整的导航解析流程
- 导航被触发
- 在失活的组件里调用离开守卫
- 调用全局的
beforeEach守卫 - 在重用的组件里调用
beforeRouteUpdate守卫 - 在路由配置里调用
beforeEnter - 解析异步路由组件
- 在被激活的组件里调用
beforeRouteEnter - 调用全局的
beforeResolve守卫 - 导航被确认
- 调用全局的
afterEach钩子 - 触发DOM更新
- 用创建好的实例调用
beforeRouteEnter守卫中传给next的回调函数
全局守卫
router.beforeEach((to,from,next) => {
    console.log(to);
    console.log(from);
    const user = JSON.parse(localStorage.getItem('user'));
    if(!user) {
        // 跳转到登录页
    	next({
            path: '/login',
            query: {
                redirect: to.fullPath
            }
        });
    } else {
    	next();
    }
})
例子:页面跳转时,若检测到用户未登录,则跳转到登录页
beforeRouteEnter
在渲染该组件的对应路由被confirm前被调用
不能访问this
beforeRouteUpdate
当前路由改变,组件被重用时调用
可以访问this
beforeRouteLeave
导航离开该组件的对应路由时调用
可以访问this
可以用于提示用户是否离开当前页面
beforeRouteLeave(to, from, next) {
    if(this.content) {
	    alert('是否离开页面');
        next(false);
    } else {
        next();
    }
}
使用meta元信息
const routes = [
  {
    path: "/",
    redirect: {name: 'Home'}
  },
  {
    path: "/Home",
    name: "/Home",
    component: ()=> import("../views/Home")
    meta: {
      requireAuth: true,
      hhh: false
  	}
  }
];通过meta.requireAuth ,meta.hhh的方式获取
本博客所有文章除特别声明外,均采用 CC BY-SA 4.0 协议 ,转载请注明出处!